About Roofing Calculator
The Roofing Calculator is a free online tool that estimates the area of a roof and the amount of materials necessary to construct or replace a roof. Whether you are a homeowner planning a DIY project, a contractor preparing a bid, or a student learning about construction, this calculator simplifies complex roofing measurements by combining multiple calculations into one easy-to-use interface. Instead of manually looking up correction factors and converting between units, you get instant, accurate results with just a few clicks.
The calculator accounts for roof pitch (slope) which significantly affects the actual roof area. A steep roof has much more surface area than a flat one, even over the same house footprint — for example, a 12/12 pitch roof has about 41.4% more surface area than the house footprint, meaning a 1,500 sq ft house footprint becomes a 2,121 sq ft roof surface. This is a critical factor that many DIY estimators overlook, leading to significant material shortages or costly over-ordering. By entering your house base area, roof pitch, and optional eaves overhang, you get accurate measurements for ordering materials and estimating costs. The Material Calculator section then converts your roof area into specific quantities for shingles, membrane roofing, and ceramic tile.
For more construction-related tools, explore our Concrete Calculator or Square Footage Calculator to complement your home improvement planning.
Roof Pitch
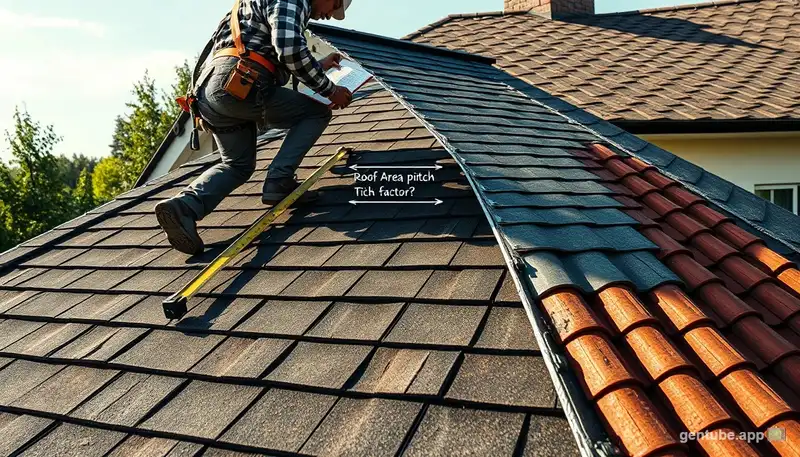
Roof pitch is the measurement of a roof's vertical rise divided by its horizontal run. In the United States, a run of 12 inches (1 foot) is standard, and pitch is expressed as the rise over 12 inches — for example, a 6/12 pitch means the roof rises 6 inches for every 12 horizontal inches. This ratio determines not only the roof's appearance but also its performance in different weather conditions.
Roof pitch is a determining factor for the cost of the roof, the actual roof area, and the type of materials used. Low-slope roofs (2/12 to 4/12) are easier to walk on and require less material, but they need specialized waterproofing since water drains more slowly. Steep-slope roofs (7/12 and above) shed water and snow more effectively, reducing the risk of leaks, but they require more materials, are more dangerous to work on, and often require specialized safety equipment. Common residential roof pitches typically range from 4/12 to 9/12, with 6/12 being the most common for single-family homes.
Our roofing calculator automatically applies the correct pitch correction factor from the table below based on your selection, ensuring accurate roof area calculations regardless of the pitch you choose. Understanding your roof pitch is essential before starting any roofing project.
Slope Correction Factors
Roof pitch affects the actual area of the roof. To find the true roof surface area, multiply the horizontal (footprint) area by the correction factor for your roof pitch. The correction factor increases as the pitch gets steeper, reflecting the additional surface area needed to cover the same footprint. For example, a roof with a 6/12 pitch requires 11.8% more material than the base area would suggest, while a 12/12 pitch requires a full 41.4% more. These factors are derived from the geometry of a right triangle, where the roof slope forms the hypotenuse and the horizontal run forms the adjacent side.
To use the table, find your roof pitch in the left column, then multiply your house base area by the corresponding factor. For example, if your house has a 2,000 sq ft footprint and an 8/12 pitch, the actual roof area is 2,000 x 1.202 = 2,404 sq ft before accounting for eaves overhang.
| Pitch |
Angle |
Multiply By |
| 1/12 | 4.8° | 1.003 |
| 2/12 | 9.5° | 1.014 |
| 3/12 | 14.0° | 1.031 |
| 4/12 | 18.4° | 1.054 |
| 5/12 | 22.6° | 1.083 |
| 6/12 | 26.6° | 1.118 |
| 7/12 | 30.3° | 1.158 |
| 8/12 | 33.7° | 1.202 |
| 9/12 | 36.9° | 1.250 |
| 10/12 | 39.8° | 1.302 |
| 11/12 | 42.5° | 1.357 |
| 12/12 | 45.0° | 1.414 |
| 13/12 | 47.3° | 1.474 |
| 14/12 | 49.4° | 1.537 |
| 15/12 | 51.3° | 1.601 |
| 16/12 | 53.1° | 1.667 |
| 17/12 | 54.8° | 1.734 |
| 18/12 | 56.3° | 1.803 |
| 19/12 | 57.7° | 1.873 |
| 20/12 | 59.0° | 1.944 |
| 21/12 | 60.3° | 2.016 |
| 22/12 | 61.4° | 2.088 |
| 23/12 | 62.4° | 2.162 |
| 24/12 | 63.4° | 2.236 |
Roofing Materials
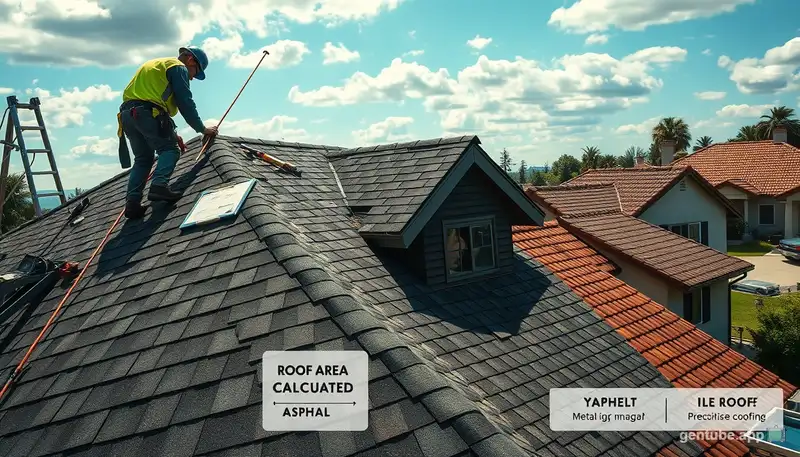
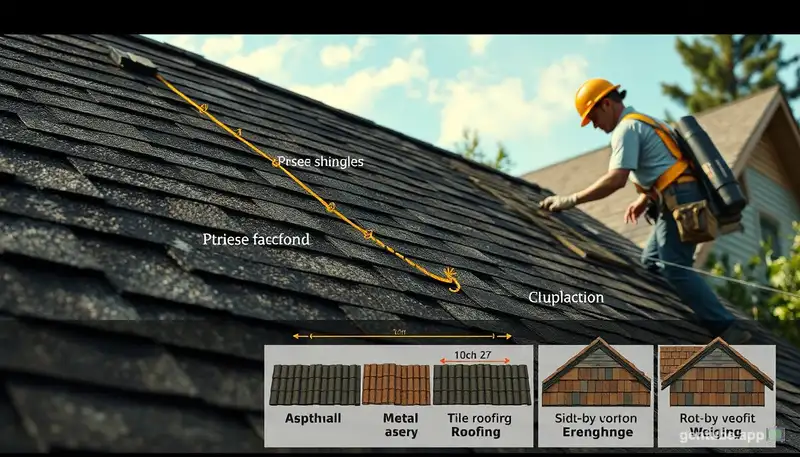
The most common roofing materials used in the United States include asphalt shingles, membrane roofing, and ceramic tile. Each material has different installation requirements, lifespan, and cost. The Roofing Calculator estimates material quantities for all three types based on your roof area.
- Asphalt Shingles - Typically have a life span of 15-30 years. Sold in bundles, with 3 bundles covering 1 square (100 sq ft). They are the most popular choice due to affordability and ease of installation.
- Membrane Roofing - Usually lasts 5-15 years. Ideal for flat or low-slope roofs. Common types include EPDM, TPO, and modified bitumen.
- Ceramic Tile - Can have a life span of over 100 years but are expensive and heavy. Popular in Mediterranean and southwestern architecture.
When ordering materials, always add 10-15% for waste, cutting, and starter strips. The calculator provides base estimates, and you should consult with a professional roofer for final quantities. Use our Area Calculator for measuring individual roof sections if your roof has a complex shape.
How to Use the Roofing Calculator
Using the Roofing Calculator is straightforward. The tool has two main sections: the Roofing Area Calculator for measuring your roof surface, and the Roofing Material Calculator for converting that area into material quantities. Follow these steps for accurate results:
Step 1: Measure Your House Base Area
Measure the length and width of your house at ground level and multiply them to get the base area. Select your preferred unit from the dropdown — square feet, square meters, square yards, square inches, or square centimeters. If your house is not a perfect rectangle, divide it into rectangular sections and sum the areas. For example, an L-shaped house can be split into two rectangles for accurate measurement.
Step 2: Select Your Roof Pitch
Choose your roof pitch from the dropdown menu. If you do not know your pitch, measure 12 inches horizontally from the roof edge and measure the vertical rise. The pitch is the rise in inches over that 12-inch run. Common residential pitches range from 4/12 to 9/12.
Step 3: Enter Eaves Overhang (Optional)
If your roof has eaves that extend beyond the walls, measure the overhang distance and enter it here. Even a small overhang adds significant area to the total roof surface, especially for larger homes.
Step 4: Add Price (Optional)
Enter the cost per square unit of your chosen roofing material to get a total cost estimate for your project. This is useful for budgeting, comparing material options, and getting a preliminary cost before contacting contractors. For example, if shingles cost $4 per square foot and your roof area is 1,500 sq ft, the material cost alone would be approximately $6,000. Our Square Footage Calculator can help with additional area measurements around your home.
How to Calculate Roof Area Step by Step
If you prefer to calculate roof area manually or want to understand how the calculator works so you can double-check your results, follow this step-by-step process using real numbers as an example. We will use a 40 ft x 30 ft house (1,200 sq ft) with a 6/12 pitch and 1 ft eaves overhang:
1. Find the Base Area
Multiply the length and width of your house at ground level. For a rectangular house, this is straightforward: length x width = base area. For our example, 40 ft x 30 ft = 1,200 sq ft.
2. Determine the Correction Factor
Use the slope correction table above to find the factor for your roof pitch. For a 6/12 pitch, the factor is 1.118.
3. Calculate Basic Roof Area
Multiply the base area by the correction factor: 1,200 sq ft x 1.118 = 1,341.6 sq ft. This is the roof surface area before accounting for eaves.
4. Add Eaves Area
If your roof has eaves, calculate the perimeter of the house, multiply by the eave width and the correction factor, then add to the basic roof area. For a 1 ft eave on our example: perimeter = 140 ft, eave area = 140 x 1 x 1.118 = 156.5 sq ft. Total roof area = 1,498.1 sq ft.
5. Convert to Material Quantities
Divide the total roof area by 100 to get squares. For shingles, multiply squares by 3 to get bundles needed. The calculator handles all these conversions automatically. Use our Volume Calculator for other construction material estimates.
Types of Roofing Materials Compared
Choosing the right roofing material depends on your budget, climate, architectural style, and personal preferences. Each material has unique advantages and drawbacks that should be carefully considered before making a decision. Here is a detailed comparison of the most common options:
Asphalt Shingles
Asphalt shingles are the most popular roofing material in North America, used on about 80% of homes. They are affordable ($3-5 per sq ft installed), available in many colors and styles, and relatively easy to install and repair. Standard 3-tab shingles last 15-20 years, while architectural (dimensional) shingles can last 25-30 years due to their thicker construction and better wind resistance. The calculator estimates 3 bundles per square for standard shingles, but architectural shingles may require 4 bundles per square depending on the manufacturer.
Metal Roofing
Metal roofing (steel, aluminum, or copper) lasts 40-70 years and is highly durable, fire-resistant, and energy-efficient. It reflects solar heat, making it an excellent choice for hot climates — uncoated metal can reduce cooling costs by up to 25% compared to dark asphalt shingles. Installed cost ranges from $6-12 per sq ft. Metal roofs are lightweight (often 50-150 lbs per square compared to 250-400 lbs for asphalt) and can frequently be installed over existing shingles, saving on tear-off and disposal costs.
Clay and Concrete Tiles
Clay and concrete tiles are extremely durable, lasting 50-100+ years with minimal maintenance. They are fire-resistant, offer excellent thermal performance, and provide a distinctive aesthetic that enhances home value. However, they are heavy — typically 600-900 lbs per square — and may require additional structural support or truss reinforcement. Installed cost ranges from $8-15 per sq ft. The calculator provides square meter estimates for ceramic tile coverage.
Slate
Slate is a natural stone that can last over 100 years with proper installation. It is fireproof, waterproof, and offers a unique, high-end appearance that significantly increases property value. However, it is expensive ($15-30 per sq ft installed), extremely heavy (800-1,500 lbs per square), and requires specialized installation skills that not all roofers possess. Slate is not suitable for all roof structures due to weight limitations.
Use our Concrete Calculator for related construction projects like foundations and driveways.
Roof Maintenance Tips for Longevity
Regular maintenance can extend the life of your roof significantly and help you avoid expensive emergency repairs. A well-maintained roof can last 25-50% longer than a neglected one, saving thousands of dollars over the life of your home. Here are essential tips to keep your roof in top condition:
1. Inspect Twice a Year
Conduct visual inspections in spring and fall, preferably on a mild day when it is safe to be on the roof or using binoculars from the ground. Look for missing, cracked, or curling shingles, rusted or separated flashing around chimneys and vents, and signs of moss or algae growth. Early detection of small problems prevents costly repairs later — a small leak that goes unnoticed can cause extensive rot and interior damage over time.
2. Clean Gutters Regularly
Clogged gutters cause water to back up under roofing materials, leading to leaks, rot, and ice dam formation in winter. Clean gutters at least twice a year (spring and fall) and ensure downspouts direct water at least 3-4 feet away from the foundation. Consider installing gutter guards to reduce cleaning frequency if you have many trees near your home.
3. Trim Overhanging Branches
Tree branches that touch or overhang your roof can scrape and damage shingles during windy conditions, drop leaves and debris that trap moisture against the roof surface, and provide access for squirrels, raccoons, and other pests. Trim branches at least 6 feet away from the roof to prevent damage and reduce debris accumulation.
4. Remove Moss and Algae
Moss and algae retain moisture against roofing materials, accelerating deterioration and reducing shingle life. Use a moss-killing solution (such as zinc sulfate or copper-based products) or install zinc or copper strips along the ridge to prevent growth. Avoid pressure washing, which can forcefully lift shingle edges, force water under shingles, and dislodge protective granules, significantly reducing shingle life.
5. Check Attic Ventilation
Proper attic ventilation prevents heat and moisture buildup that can warp roof decking, reduce shingle life, and promote mold growth. Ensure intake vents at the eaves (soffit vents) and exhaust vents at the ridge or gable ends are clear of insulation, debris, and pest nests. The general rule is 1 square foot of ventilation per 300 square feet of attic floor area. Our Volume Calculator can help you calculate attic volume for ventilation planning.
Common Roofing Mistakes to Avoid
Roofing is a complex trade, and even experienced DIYers can make costly errors that compromise the integrity of their roof and lead to premature failure, leaks, and expensive repairs. Here are common roofing mistakes and how to avoid them:
Incorrect Material Quantity Estimates
Ordering too little or too much material is a frequent and expensive mistake. Always use a roofing calculator to estimate quantities accurately, and add 10-15% for waste from cutting, trimming, damaged materials, and starter strips. For complex roofs with many valleys, hips, and penetrations, use a higher waste factor of 15-20%. Running short mid-project can delay construction for days while you wait for additional materials, and partial pallets or odd lots may not match the color or batch of your original order.
Improper Flashing Installation
Flashing around chimneys, vents, skylights, and valleys is the most common source of roof leaks — accounting for the majority of all roof leak repairs. Improperly installed, missing, or deteriorated flashing allows water to penetrate the roof deck and enter the home. Always use proper flashing techniques with step flashing for sidewalls, continuous flashing for chimneys, and valley flashing that extends far enough up the roof slope. Use materials compatible with your roofing type and local climate.
Ignoring Local Building Codes
Building codes specify minimum requirements for roof pitch, material types, fire ratings, wind resistance, and installation methods. Failing to meet code requirements can result in failed inspections, fines, difficulty selling your home, and insurance claim denials after storm damage. Check with your local building department before starting any roofing project, and ensure all work meets or exceeds the minimum code requirements for your area.
Poor Nailing Technique
Shingles must be nailed correctly with the right nail length (typically 1.25 inches for standard shingles), proper placement (in the nailing zone marked on the shingle), and correct depth (flush with the shingle surface — not driven too deep or left protruding). Nails driven too deep can cut into the shingle below, while nails driven at the wrong angle can miss the decking entirely. Most manufacturers specify a nailing pattern of 4-6 nails per shingle, and using fewer than recommended voids the warranty.
Skipping Underlayment
Roof underlayment provides a critical secondary water barrier beneath the primary roofing material. Skipping underlayment or using low-quality felt paper to save money is a false economy — a single leak can cause thousands of dollars in interior damage. Use a minimum of #15 felt or, better yet, synthetic underlayment which is lighter, stronger, and more durable than traditional felt. Synthetic underlayment also provides better walkability during installation and can be exposed to the elements for longer periods without damage.
How Roof Pitch Affects Material Costs
Roof pitch has a direct impact on material costs because steeper roofs have more surface area. For example, a 1,500 sq ft house with a 4/12 pitch has a roof area of about 1,581 sq ft. The same house with a 12/12 pitch has a roof area of 2,121 sq ft — 34% more material needed. If shingles cost $4 per square foot installed, that is a difference of over $2,100 between the two pitches for the same house footprint.
Steeper roofs also require additional safety equipment like harnesses, scaffolding, and roof jacks, which add to the project cost. Specialized installation techniques are needed for high pitches — for example, shingles on steep roofs may require additional nails or adhesive to prevent slipping during installation. Roofers typically charge more for steep pitches due to the increased difficulty, risk, and time required. The labor cost multiplier for steep roofs (9/12 and above) can range from 1.5x to 2.5x compared to low-slope roofs (2/12 to 4/12).
Additionally, certain materials are only suitable for specific pitch ranges. Asphalt shingles require a minimum pitch of 2/12 for proper drainage. Membrane roofing is ideal for flat to 3/12 pitches. Clay tiles typically need a minimum of 4/12. Understanding these limitations helps you choose the right material for your roof's pitch.
The Roofing Calculator automatically applies the correct pitch factor and can help you compare costs across different pitch scenarios. Use the price input to see how different pitches affect total project cost for your chosen material. Our Area Calculator provides additional measurement tools for planning.
Roofing for Different Climates
Your local climate should heavily influence your roofing material and pitch choices. Choosing the wrong roofing system for your climate can lead to premature failure, leaks, and higher energy bills. Here is a guide to roofing considerations by climate type:
Snowy and Cold Climates
In areas with heavy snowfall, steep pitches (6/12 to 12/12) help snow slide off naturally, reducing the risk of ice dams and structural load from accumulated snow. Metal roofing is excellent for snow shedding because its smooth surface allows snow to slide off easily. Asphalt shingles should have a cold-temperature rating to prevent cracking in freezing conditions. Ice and water shield membrane should be installed along eaves and in valleys as a secondary barrier against ice dam damage. Proper attic insulation and ventilation are critical to prevent warm air from melting snow on the roof, which refreezes at the eaves and creates damaging ice dams.
Hot and Sunny Climates
In hot climates, choose roofing materials with high solar reflectance, often called cool roofs. Light-colored metal, white or light-colored tile, or reflective asphalt shingles can reduce cooling costs by 10-15% by reflecting more sunlight and absorbing less heat. Tile roofs with an air gap beneath the tiles provide natural insulation through the chimney effect, where air circulates and carries heat away. Radiant barrier sheathing installed beneath the roof deck can further reduce heat transfer into the attic. Adequate attic ventilation is crucial to prevent heat buildup that can damage shingles and increase cooling loads.
Hurricane and High-Wind Areas
In hurricane-prone regions such as coastal areas, use wind-rated shingles rated for the expected wind speeds in your zone. Enhanced nailing patterns (6 nails per shingle instead of 4) provide additional uplift resistance. Metal roofing with standing seams performs exceptionally well in high winds because the interlocking panels create a continuous weather-resistant surface. Consider a hip roof design instead of gable ends — hip roofs are inherently more aerodynamic and less likely to suffer wind damage. Ring-shank nails provide better holding power than smooth-shank nails in high-wind applications.
Wet and Humid Climates
In humid climates, moss and algae growth are common concerns that can shorten roof life. Use algae-resistant shingles containing copper granules, which inhibit moss and algae growth naturally. Ensure proper attic ventilation to prevent moisture buildup that can lead to mold, rot, and reduced insulation effectiveness. Slate and tile perform well in wet climates due to their non-porous nature and resistance to moisture absorption. Regular cleaning and treatment can help prevent biological growth on roofing surfaces.
Use our Square Footage Calculator for measuring any part of your home improvement project.
Final Thoughts on Using a Roofing Calculator
A roofing calculator is an essential tool for anyone planning a roofing project — from homeowners to professional contractors. Accurate measurements are the foundation of a successful roofing job, ensuring you order the right amount of materials, stay within budget, and avoid costly mid-project delays. A typical roofing project can cost anywhere from $5,000 to $30,000 or more, so accurate estimates are critical for proper budgeting.
While our calculator provides reliable estimates for standard roof shapes (gable, shed, and simple hip roofs) and common materials, complex roofs with multiple valleys, dormers, skylights, and other penetrations may require professional measurement. The calculator's eaves overhang feature helps account for extensions beyond the wall line, but intricate roof geometries are best measured by an experienced contractor who can account for all variables.
The calculator is an excellent starting point for budgeting, planning, and comparing material options. Use it early in your project to get a sense of costs, then consult with licensed roofing contractors for final quantities, installation quotes, and material recommendations specific to your area. Many contractors will provide free estimates based on your roof area calculation.
Start using the Roofing Calculator above to estimate your project today. Combine it with our other construction tools like the Concrete Calculator, Area Calculator, and Volume Calculator for comprehensive project planning. A well-planned roof protects your home and family for decades, making the upfront planning time a valuable investment.
To learn more about roofing calculator, visit timeanddate.com.